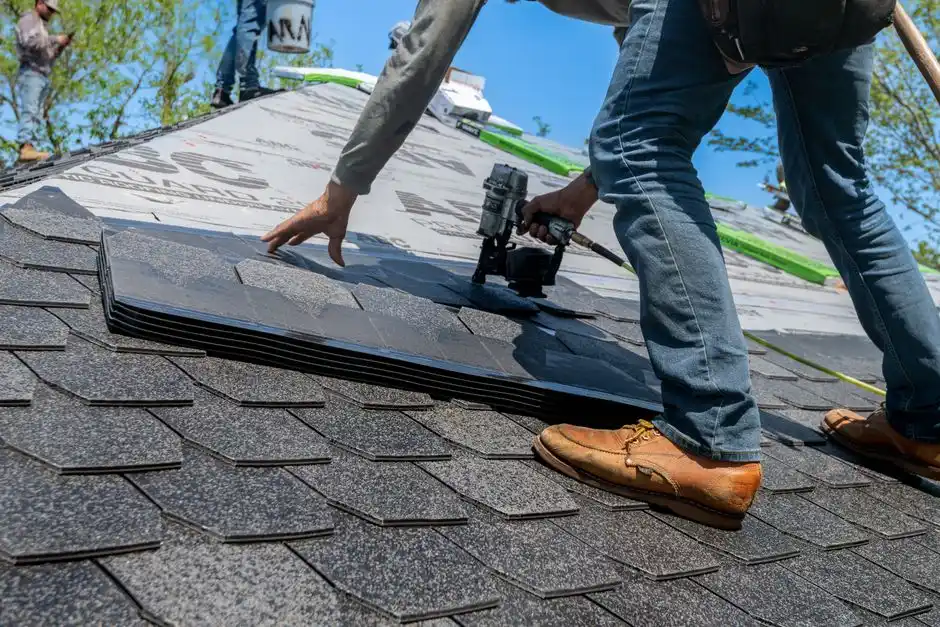
You repair step flashing on a shingle roof by lifting the shingles above the failed piece, removing the old metal, sliding in a new L-shaped step flashing that tucks under the shingle above and over the shingle below, then nailing it high on the wall leg and sealing the top edge - one piece per course, never one long strip. That is the whole job in two sentences. The rest of this guide covers how we diagnose the leak, the exact materials that hold up in Altadena's sun and wind, what a repair costs here in 2026, and the mistakes that turn a $400 fix into a $4,000 deck replacement.
What step flashing does and why it fails
Step flashing is the series of small L-shaped metal pieces that waterproof the joint where a sloped shingle roof meets a vertical wall, chimney, or dormer. Each piece is roughly 4 by 4 by 4 inches, bent at 90 degrees, and woven into the shingle courses so water running down the wall or the roof plane gets redirected onto the shingles instead of behind them.
It fails for three predictable reasons. First, galvanized steel from the 1970s and 1980s corrodes through at the bend - we see this constantly on Altadena homes built before 1985. Second, the pieces get nailed through the face instead of the hidden top edge, which punches a hole straight through the metal. Third, roofers run one continuous strip of flashing along the wall instead of individual steps, and that single strip buckles and opens gaps as the roof expands and contracts.
Altadena adds its own pressure. Summer surface temps on a dark shingle roof hit 160 to 180 degrees Fahrenheit, and winter wind-driven rain from the San Gabriels pushes water sideways into any gap wider than about 1/16 inch. That combination finds every weak point in the flashing.
How do you know your step flashing is leaking?
You know step flashing is leaking when you see water staining on the interior wall or ceiling directly below where the roof meets a vertical surface, usually within 2 to 4 feet of the wall line. The stain often shows up on the second floor or in the attic first, because water travels down the wall cavity before it soaks through drywall.
Other signs we look for during a Roof Flashing Inspection Altadena CA:
- Rust streaks or white mineral deposits on the shingles next to the wall
- Lifted, cracked, or missing shingle tabs along the wall line
- Visible gaps between the flashing and the wall, or flashing that pulls away when you press it
- Granule loss and dark staining on the shingle course directly below the wall
- Musty smell in the attic after a rain, even without a visible stain
If you see any of these, get on it before the next storm. A step flashing leak that runs for one rainy season in Altadena routinely rots the sheathing and the top plate of the wall framing, and that is when the repair cost triples.
Tools and materials for a step flashing repair
For a proper step flashing repair on a shingle roof, you need 26-gauge or heavier metal step flashing, roofing nails, a flat pry bar, a hammer, tin snips, and a tube of polyurethane or butyl flashing sealant - not silicone, which peels off shingle roofs within two years in our climate.
Here is what we load on the truck for a standard repair:
- Step flashing pieces - 4x4x4 inch, 26-gauge galvanized steel or, better, copper or lead-coated copper for longevity
- Roofing nails - 1-1/4 inch hot-dipped galvanized, hand-driven
- Flashing sealant - polyurethane, rated for 50-year exterior exposure
- Replacement shingles - matching tabs to replace any you break during the lift
- Ice and water shield - for the wall-to-roof transition if the existing underlayment is compromised
If the metal itself is sound but the sealant has failed, a Roof Flashing Sealing Altadena CA service can buy you several more years without pulling shingles. If the metal is rusted through, sealing is a waste of money - the flashing has to come out.
How to repair step flashing on a shingle roof in Altadena CA
Repairing step flashing on a shingle roof in Altadena follows the same sequence whether you are on a 1920s bungalow near Mariposa Street or a 1990s build up near Eaton Canyon: work from the bottom of the run upward, one course at a time, so every piece overlaps the one below it.
Step 1: Find the exact failure point
Start at the lowest suspect course and work up. Lift the shingle tab gently with a flat pry bar. The flashing underneath should be clean metal tucked tight against the wall. If you see rust, a nail hole, or a gap, you found it.
Step 2: Lift the shingles above and below
You need access to about 12 inches of the wall line - one full shingle course above and below the failed piece. Work in cool morning hours if you can; shingles above 100 degrees Fahrenheit tear instead of flex, and Altadena summer afternoons get there fast.
Step 3: Remove the old flashing
Pull the nails holding the old step flashing. Do not pry against the shingles - pry against the flashing. If the metal is stuck to the wall with old tar, cut it free with a utility knife rather than yanking.
Step 4: Install the new step flashing
Slide the new piece into place so the vertical leg sits flat against the wall and the horizontal leg sits on top of the shingle below. Nail it high on the vertical leg - two nails, no lower than 1 inch from the top edge - so the next course covers the nail heads. Never nail through the horizontal leg.
Step 5: Seal and re-shingle
Run a bead of polyurethane sealant along the top edge of the vertical leg where it meets the wall, then relay the shingle tab over the horizontal leg. Repeat for every course up the wall. One piece per course, every time.
What step flashing repair costs in Altadena in 2026
Typical 2026 pricing in Altadena for step flashing repair runs $350 to $650 for a single localized repair, $900 to $1,800 for a full wall run of 10 to 20 feet, and $2,500 and up if the repair uncovers rotted sheathing or framing that has to be replaced first.
What drives the number:
- Access - a two-story wall or a steep 10/12 pitch adds labor and safety setup
- Material - galvanized is cheapest, copper runs 2 to 3 times the material cost but lasts 50-plus years
- Extent - one failed piece versus every piece along a 20-foot wall
- Hidden damage - rotted sheathing, wet insulation, or damaged framing found once the shingles come up
We quote the repair before we start and stick to it. If we open the roof and find something worse, we stop and show you photos before doing anything else.
Common mistakes we see on Altadena roofs
The single biggest mistake is running one continuous strip of flashing along the wall instead of individual step pieces. It looks fine for a year. Then thermal movement opens a gap, and the next storm sends water straight into the wall.
Other mistakes we fix regularly:
- Nailing through the face of the flashing - every nail is a future leak
- Using silicone caulk - it fails in 18 to 24 months on a hot roof; polyurethane lasts decades
- Skipping the housewrap or underlayment behind the flashing - the metal is the first line of defense, not the only one
- Reusing rusted flashing - if the metal is compromised, sealant will not save it
- Lifting shingles in cold weather - below 50 degrees Fahrenheit, shingles crack instead of flex
If your flashing is past its service life across the whole roof, a Roof Flashing Replacement Altadena CA is cheaper long-term than chasing leaks one at a time.
When to call a professional
Call a professional when the leak is above the first story, when the flashing runs along a chimney or dormer, or when you cannot find the failure point after 30 minutes of looking. Those three situations account for most of the calls we run in Altadena.
We handle step flashing repair every week on shingle roofs across Altadena - from the foothill streets above Lake Avenue to the older Craftsman homes near the country club. We find the leak, replace the failed flashing, seal it properly, and test it with a hose before we leave. If the job needs more than step flashing - say, a chimney or skylight that is also leaking - we handle that in the same visit.
If you want a second opinion on a repair you have already tried, we will tell you honestly whether it is worth redoing or whether you need a full replacement.
Frequently Asked Questions
How much does step flashing repair cost in Altadena CA?
In 2026, most step flashing repairs in Altadena run $350 to $650 for a single localized fix and $900 to $1,800 for a full wall run. If rotted sheathing or framing is uncovered, add $1,500 or more. We quote before we start.
How to repair step flashing on a shingle roof in Altadena, California?
Lift the shingles above and below the failed piece, remove the old metal, slide in a new 4x4x4 inch step flashing that tucks under the shingle above and over the shingle below, nail high on the wall leg, seal the top edge, and relay the shingles. One piece per course.
Can you fix step flashing in Altadena?
Yes. We repair step flashing on shingle roofs throughout Altadena, including chimney, dormer, and wall transitions. Most repairs take 2 to 4 hours and we test with water before we leave.
Do you offer step flashing fix near me in Altadena?
We serve all of Altadena, from the foothill neighborhoods above Altadena Drive to the streets near Fair Oaks. Call or text and we will schedule a look, usually within a few days.
How long does step flashing last?
Galvanized step flashing lasts 20 to 30 years in Altadena's climate. Copper lasts 50-plus years. If your flashing is original to a pre-1985 roof, assume it is at or past the end of its service life.
Get help with Roof Flashing Repair in Altadena
If your step flashing is leaking and you want it fixed right the first time, call Hometown Roof Protectors at 012345678. We repair step flashing on shingle roofs across Altadena and can usually get out within a few days.